
Affordable custom packaging boxes with logo printing in NYC should not force you to choose between quality and cost. The right packaging can protect your product, reinforce your brand, streamline fulfillment, and still work within a realistic budget.
The challenge is knowing where to spend and where to simplify. Box style, material, printing method, order quantity, and finishing choices all affect the final price—and the customer experience.
For New York City businesses, limited storage, tight launch schedules, local delivery requirements, and high-volume shipping add another layer to the decision. This guide breaks down how to choose custom packaging that looks professional, performs reliably, and avoids unnecessary costs.
Key Takeaways
- Choose packaging based on product protection, sales channel, fulfillment needs, and total cost.
- Match the box style, material, print method, and order quantity to the project instead of adding unnecessary features.
- Test the structure and artwork before production to avoid costly errors, delays, and excess inventory.
Step 1: Decide What the Packaging Must Do
Before comparing custom boxes or finishes, define the packaging’s job.
Protect the product. Lightweight items may suit custom paperboard boxes, while heavier or fragile products often need corrugated boxes and secure box inserts. The right material strength protects the product without adding excess weight or material waste.
Present the brand. Custom-printed boxes should make the brand easy to recognize. A clear logo, consistent colors, and strong placement can create a lasting impression without overcomplicating the design.
Support the sales channel. Shipping boxes and custom mailer boxes must hold up in transit. Retail packaging needs shelf appeal and clear product information. Subscription boxes, influencer kits, and gift packaging may focus more on presentation and the unboxing experience.
Make fulfillment easier. Packaging should be easy to fold, fill, seal, label, and store. A low-cost box can become expensive if it slows down packing or requires extra materials.
Step 2: Set a Realistic Packaging Budget
Affordable packaging starts with clear priorities.
Separate essentials from extras. Accurate dimensions, proper strength, secure closures, and readable branding are essential. Foil, embossing, ribbons, soft-touch coatings, and full interior printing are optional upgrades.
Understand the full cost. Setup-related costs may include dielines, cutting dies, plates, structural design, and sampling. Proofing may be included, charged separately, or tied to the sampling process.
Variable costs include materials, coatings, inserts, assembly, and shipping. A quote for affordable custom corrugated boxes may look attractive until tooling, freight, or finishing is added, so compare the full project cost rather than the unit price alone.
Calculate the cost per order. Include labels, tape, filler, tissue paper, storage, labor, and delivery. For NYC projects, also consider local delivery fees, limited receiving hours, loading access, and the cost of storing bulky cardboard boxes.
Budget for testing. A blank sample or printed prototype can reveal fit, structure, and artwork issues before production. Testing may add an upfront cost, but it can prevent expensive reprints and protect the quality of the final product.
Step 3: Measure the Product Before Choosing a Box
Accurate measurements help control costs and reduce material waste.
Measure the complete packout. Record the product’s length, width, height, and weight, along with accessories, printed materials, protective wrapping, and inserts.
Include cushioning and inserts. A well-designed insert can secure the product while reducing loose filler. The box dimensions should account for every component inside the package.
Confirm interior dimensions. Corrugated cardboard and rigid board reduce usable space. Confirm whether the quote lists interior or exterior measurements before approving the structure.
Test the fit. A blank structural sample lets you check fit, closure, assembly, and product removal before printing begins.
Step 4: Choose the Right Box Style
The best structure should match the product, sales channel, and budget without adding unnecessary complexity.
Mailer boxes for e-commerce. Mailer boxes work well for e-commerce orders, subscription boxes, influencer kits, and launches. They offer generous print space and can often serve as the shipping container.
To control costs, print only the exterior or add a simple one-color message inside. Businesses comparing New York City mailer boxes should review material strength, print quality, delivery terms, and turnaround time.
Corrugated boxes for shipping. Corrugated shipping boxes are suited to heavier products, wholesale orders, and fragile goods. A one- or two-color logo can create strong branding without the cost of full-color coverage.
Folding cartons for retail. Folding cartons, also called custom paperboard boxes, are commonly used for cosmetics, wellness products, food items, and other lightweight retail goods. They print cleanly and store flat before assembly.
Rigid boxes for premium presentation. Rigid boxes suit jewelry, luxury products, corporate gifts, and special launches. Options include drawer boxes, magnetic closures, and turned-edge boxes.
They cost more because they use thicker materials and often require additional setup, wrapping, finishing, and manual assembly. Their premium feel is most valuable when presentation supports the product’s price and positioning.
Sleeves for product variations. A printed sleeve can turn a stock box into branded product packaging. It is useful across a product line, seasonal campaign, or limited edition because the sleeve can change while the base box stays the same.
Labels for small runs. Labels provide a budget-friendly branding layer for a small business testing a product. They require less commitment than direct package printing or fully custom printing, though they are not a full standalone packaging format.
Step 5: Select a Material That Matches the Product
The right material balances strength, appearance, print quality, and environmental impact.
Corrugated cardboard. Corrugated board is durable and well-suited to mailers and shipping cartons. Choose the grade based on product weight, stacking, and handling conditions.
Paperboard. Paperboard is thinner and smoother than corrugated material. It works well for folding cartons, detailed graphics, and lightweight retail products.
Kraft board. Kraft paper and kraft board provide a natural look that pairs well with dark inks and simple branding. Because the brown surface affects color, review a proof when color accuracy matters.
White board. White board creates a brighter base for photography, detailed artwork, and clean retail presentation.
Rigid board. Rigid board is used for premium packaging and gift-ready presentations. It offers a substantial feel but requires more material, labor, and assembly.
Recycled materials. Businesses considering eco-friendly materials should review recycled content, coatings, adhesives, and local recycling options. Recycled, recyclable, biodegradable, and compostable describe different properties, so choose materials based on the full package rather than a single claim.
Step 6: Choose the Most Cost-Effective Logo Printing Method
The right process depends on the artwork, material, quantity, and schedule.
Digital printing for short runs. Digital printing is a great method for prototypes, short runs, personalized designs, and multiple artwork versions. It supports full-color graphics with a less traditional setup.
Flexographic printing for corrugated boxes. Flexographic printing works well for bold logos and simple one- or two-color designs. It is often cost-effective for repeat orders and larger quantities.
Offset printing for detailed graphics. Offset printing delivers consistent color and fine detail for folding cartons and other printed packaging. Setup may cost more, but the unit price can improve at higher volumes.
Screen printing for specialty projects. Screen printing is a niche option for rigid packaging, specialty materials, or projects that require a distinctive ink effect. It is not commonly used for standard box production.
Digital printing often suits smaller full-color runs. Flexographic printing is practical for simple corrugated designs. Offset printing is usually better for detailed artwork at higher quantities.
Step 7: Decide How Much Printing You Really Need
More coverage does not always produce better packaging.
Logo-only printing. A single logo can work well for shipping cartons, minimalist brands, and business-to-business packaging.
Partial-coverage printing. A printed lid, side-panel pattern, interior message, or QR code can create visual interest without covering every surface.
Full-color exterior printing. Full-color printing is most useful when the design relies on photography, illustration, product information, or retail visibility.
Interior printing. A one-color thank-you message, instruction, or QR code can improve the customer experience without significantly increasing complexity.
Step 8: Add Finishes Carefully
Finishes should complement the design and product positioning.
Matte and gloss finishes. A matte finish creates a modern, low-glare look. Gloss lamination adds shine and can make colors appear more vibrant.
Lamination. Lamination can protect the surface and improve appearance, but it adds cost and may affect recyclability.
Foil stamping. Foil can highlight a logo or product name. Use it selectively because it often requires additional tooling.
Embossing and debossing. These techniques add texture by raising or pressing artwork into the surface.
Spot gloss and raised effects. Spot gloss and raised coatings create contrast on selected areas, such as logos or patterns.
One thoughtful finish often creates a better result than several competing effects. The goal is beautiful packaging, not unnecessary decoration.
Step 9: Select an Order Quantity That Fits the Business
The minimum order quantity varies by box style, material, printing process, and supplier.
Why larger orders cost less per box. Setup costs are spread across more units, which usually lowers the unit price.
Why the lowest unit price can still cost more. Excess inventory takes up space and may become unusable if branding or product details change. This matters in NYC, where storage can be limited and expensive.
When a short run makes sense. Short runs work well for product testing, seasonal campaigns, influencer kits, and new launches.
When a larger run makes sense. A larger quantity is more practical when demand, artwork, dimensions, and storage needs are stable.
Request pricing at several volumes and compare competitive pricing against cash flow, storage, and expected use.
Step 10: Prepare Artwork That Prints Correctly
Strong materials and advanced printing services cannot compensate for poor files.
Use print-ready logo files. Provide vector artwork, such as AI, EPS, or print-ready PDF, whenever possible.
Design on the approved dieline. The dieline shows cuts, folds, glue areas, bleed, and safe zones. Keep important elements clear of trim and fold lines.
Confirm color expectations. Colors may appear different on screen, kraft paper, white board, or corrugated material. Review an appropriate proof before production.
Check small text and fine lines. Test small type, barcodes, QR codes, and fine details at their final printed size.
Review every panel. Confirm spelling, orientation, product information, contact details, and required legal copy before approval.
Step 11: Approve the Right Kind of Proof
Proofing helps catch problems before they reach production.
Digital proof. A digital proof checks layout, copy, panel orientation, and artwork placement. It is useful for review, but it cannot fully show material texture, structural performance, or exact printed color.
Blank structural sample. A blank sample lets you test fit, closure, assembly, insert placement, and ease of use before approving the design.
Printed prototype. A printed prototype is helpful for premium launches, photography, retail presentations, and projects where color and finish are especially important.
Production sample. Complex or high-volume projects may justify reviewing a production sample before the full run proceeds. The appropriate proofing process will depend on the project, supplier, and production method.
Step 12: Plan the Timeline Backward From the Delivery Date
A realistic schedule should include every stage between concept and delivery.
Allow time for design and approval. Structural planning, dielines, artwork preparation, revisions, and final approvals all happen before production starts.
Account for production steps. Foil, lamination, inserts, die-cutting, and rigid-box assembly may add time. More complex custom packaging options usually require a longer schedule than simple printed cartons.
Include freight and distribution. Plan for delivery to stores, warehouses, fulfillment centers, events, or individual recipients. In New York City, commercial receiving windows, loading access, traffic, and multi-location deliveries can affect timing.
Avoid relying on rush production. A fast turnaround may be possible, but rush fees and expedited freight can quickly reduce the value of competitive pricing. Early approvals provide more flexibility and reduce avoidable delays.
Step 13: Compare Packaging Quotes Correctly
A useful quote comparison requires matching specifications.
Compare the same project details. Check dimensions, material grade, printing method, colors, finishes, inserts, quantity, and delivery terms. Quotes built around different custom packaging solutions are not directly comparable.
Identify one-time charges. Ask whether the price includes structural design, dies, plates, samples, and setup. These charges may be listed separately or built into the total.
Ask what is excluded. Freight, assembly, storage, taxes, and fulfillment may not be included. Clarifying these items early helps prevent surprises.
Review reorder terms. Find out whether tools can be reused, how long files are retained, and whether future runs can match the same materials and color standards.
Evaluate service, not just price. A leading custom packaging company should offer clear communication, practical guidance, accurate proofs, and realistic schedules. A responsive customer service team can be just as valuable as the quoted price when deadlines are tight.
Step 14: Reduce Cost Without Making the Packaging Look Cheap
Strong cost control comes from using fewer resources more intentionally.
Use fewer colors. One well-chosen brand color can look cleaner and more polished than a complicated palette.
Reduce print coverage. Let the material work as part of the design. Strategic logo placement can create a high-quality custom look without printing every panel.
Use a standard structure. A standard box may reduce tooling and setup costs. Custom sizing may still be worthwhile when it lowers storage or shipping expenses.
Build a modular system. Use one base box with different sleeves, labels, inserts, or gift bags across several products or campaigns. This approach gives a small business more flexibility without creating entirely new packaging for every version.
Simplify inserts. Paperboard or corrugated inserts may provide the support you need without adding unnecessary materials or labor.
Consolidate related items. Coordinating packaging, labels, inserts, cards, and promotional pieces through one provider can improve consistency and simplify production.
Step 15: Avoid Common Packaging Mistakes
A few avoidable decisions can increase costs or weaken the final result.
Prioritizing appearance over performance. Beautiful packaging still needs to protect the product and function properly in storage, shipping, and display.
Copying another brand’s packaging. Competitors may have different products, margins, order volumes, and distribution needs. Their packaging solution may not fit yours.
Using an oversized box. Extra space increases material use, filler, storage, and freight costs.
Ignoring packing labor. Complicated structures can slow assembly and raise fulfillment expenses.
Using too many materials. Multiple layers, coatings, and inserts can increase cost and make disposal more difficult.
Skipping physical testing. A digital rendering cannot confirm fit, closure, or shipping performance.
Approving artwork too quickly. Typos, misplaced panels, and outdated details become expensive once production begins.
Printing too much time-sensitive information. Promotions, URLs, dates, and product details may change before the full order is used.
Step 16: Make the Packaging More Sustainable
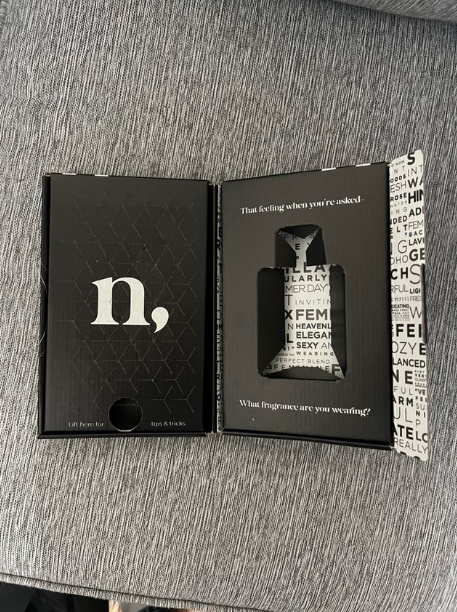
Eco-friendly packaging solutions should reduce waste without compromising product protection.
Start with material reduction. Use the smallest practical structure and remove unnecessary components.
Choose materials based on real disposal options. Look at recycled content, recyclability, coatings, and local waste systems. Eco-friendly materials are most useful when customers can handle them properly after use.
Design components for separation. When multiple materials are necessary, make them easy to separate.
Use clear disposal instructions. Accurate instructions are more helpful than broad environmental claims.
Consider the full package. Soy-based inks are common in offset printing, while water-based inks are used in certain printing applications. Neither automatically makes packaging recyclable, biodegradable, or compostable.
The environmental impact depends on the full package, including coatings, adhesives, laminates, inks, and inserts. The best approach is often a perfect blend of material reduction, responsible sourcing, and practical end-of-life planning.
Bring Your Custom Packaging Idea to Life
Custom packaging can get complicated fast. Materials, finishes, quantities, deadlines, and fulfillment all need to work together without pushing the project over budget.
At All Print Resources, we help streamline the process with custom luxury packaging, shipping boxes, influencer kits, digital and offset printing, specialty finishes, kitting, warehousing, fulfillment, and distribution.
Whether you are planning a product launch, gifting program, influencer campaign, or larger rollout, we can help keep the project organized from concept through delivery. Call All Print Resources today to discuss your custom packaging needs.
Conclusion
The best affordable custom packaging boxes with logo printing in NYC are not simply the boxes with the lowest price. They protect the product, fit the sales channel, support the brand, and avoid unnecessary material, labor, storage, and shipping costs.
Start with accurate measurements, choose the simplest structure that performs well, match the printing process to the quantity, and test before production. Thoughtful planning is what turns affordable packaging into effective packaging.
Frequently Asked Questions
What should I consider before ordering custom boxes?
Start with the product’s size, weight, fragility, sales channel, and expected order volume. Then compare material strength, print requirements, storage needs, assembly time, and delivery costs. The best custom boxes fit the product closely and support the way it will be sold or shipped.
Which custom packaging solutions work best for small businesses?
Small businesses often benefit from short-run digital printing, standard box structures, printed sleeves, or labels applied to stock packaging. These custom packaging solutions reduce upfront commitment while still creating a professional, branded appearance.
Can custom mailer boxes be used as shipping boxes?
Yes, many custom mailer boxes are designed to serve as both the branded package and the shipping container. The board strength and closure must still match the product’s weight and shipping conditions, so physical testing is important before placing a full order.


